Introduction
A Barbie cake is a delightful centerpiece for birthdays, parties, or special celebrations, especially for anyone who loves dolls and princess themes. This cake combines baking creativity with artistic decoration to create a visually stunning dessert that doubles as a showpiece. With its iconic doll centerpiece surrounded by layers of cake shaped like a ball gown, a Barbie cake is as much fun to make as it is to serve.
The beauty of a Barbie cake lies in its customizability. You can choose the doll, the color scheme, and the decorations to match your theme—whether it’s a princess, ballerina, or fairy. While it may seem like a complicated project, this guide will break down the process into simple steps that anyone can follow, from novice bakers to seasoned decorators.
Get ready to impress with this stunning Barbie cake that will make any celebration unforgettable!
Ingredients for a Barbie Cake
Creating a Barbie cake is as much about the ingredients as it is about the artistry! Below is an expanded guide to the ingredients needed to make a stunning Barbie cake, ensuring every element is perfect, from the fluffy cake layers to the intricate details of the decoration.
Cake Base Ingredients
Flour
- Amount: 2 ½ cups of all-purpose flour.
- Purpose: Flour forms the structural foundation of the cake, ensuring it holds together while remaining tender and moist. Use all-purpose flour for a balance between structure and softness.
Sugar
- Amount: 2 cups of granulated sugar.
- Purpose: Adds sweetness while contributing to the cake’s tenderness by retaining moisture. Opt for superfine sugar for smoother batter consistency.
Butter
- Amount: 1 cup of unsalted butter, softened to room temperature.
- Purpose: Butter provides richness and flavor, creating a tender crumb. Softened butter creams better with sugar for an airy texture.
Eggs
- Amount: 4 large eggs.
- Purpose: Eggs add structure, moisture, and stability to the batter. They also help emulsify the ingredients, ensuring a smooth and even texture.
Baking Powder
- Amount: 2 ½ teaspoons.
- Purpose: Acts as a leavening agent, making the cake light and fluffy. Double-check freshness to avoid flat cake layers.
Milk
- Amount: 1 cup of whole milk.
- Purpose: Adds creaminess and moisture. Whole milk works best for a rich flavor and soft texture. For extra depth, consider substituting a portion with buttermilk.
Vanilla Extract
- Amount: 2 teaspoons.
- Purpose: Enhances the overall flavor, providing a warm, sweet aroma. Use pure vanilla extract for the best results.
Frosting Ingredients
Buttercream Frosting
- Amount: 3 cups (store-bought or homemade).
- Purpose: Serves as the “gown” of the Barbie cake, providing a base for decoration. Homemade buttercream can be flavored or colored as desired, allowing for full customization.
Gel Food Coloring
- Purpose: For vibrant and customizable colors to match your theme. Gel coloring is ideal as it provides rich pigmentation without altering frosting consistency.
Fondant (Optional)
- Amount: 1–2 lbs of fondant.
- Purpose: Adds a smooth and elegant finish to the cake, perfect for creating intricate designs like pleats, bows, or drapes. Roll fondant thinly to avoid excessive sweetness.
Decorations
Edible Pearls or Glitter
- Purpose: Adds a glamorous and sparkly touch to the Barbie cake, making it a showstopper. Ensure decorations are labeled as food-safe.
Piping Bags and Tips
- Purpose: Essential for detailed frosting designs like ruffles, rosettes, or lace patterns. Use different tips for variety in design, such as star or petal tips.
Sprinkles or Candy
- Purpose: Adds playful embellishments to enhance the cake’s design. Consider thematic options like heart-shaped sprinkles or pastel candies.
Barbie Doll
- Purpose: The centerpiece of your cake! Choose a doll that complements your cake’s theme. For hygiene, wrap the doll’s lower body in plastic wrap or use a doll pick specifically designed for cakes.
Tips for Preparing the Ingredients
- Sift Dry Ingredients
- Sifting flour and baking powder ensures a smooth, lump-free batter, resulting in a more even texture.
- Room Temperature Ingredients
- Butter, eggs, and milk should be at room temperature to mix evenly and create a fluffy batter.
- Customizing Colors and Flavors
- Experiment with gel food coloring to create gradients or ombre effects for the frosting.
- Add almond or lemon extract for a twist on the classic vanilla flavor.
- Handling Fondant
- Dust your surface with cornstarch or powdered sugar to prevent sticking while rolling out the fondant.
- Practice Piping Techniques
- Before decorating the cake, practice your frosting designs on parchment paper to perfect your technique.
With these detailed ingredients and preparation tips, you’re ready to create a Barbie cake that not only looks stunning but tastes incredible. Happy baking! 🎂
Step-by-Step Instructions for Making a Barbie Cake
Follow these detailed steps to create a stunning Barbie cake that will be the highlight of any celebration.
1 – Bake the Cake Layers
- Prepare the Batter:
- In a large mixing bowl, cream together 1 cup softened butter and 2 cups sugar until light and fluffy.
- Add 4 large eggs, one at a time, mixing well after each addition.
- Stir in 2 teaspoons vanilla extract.
- In a separate bowl, whisk together 2 ½ cups flour and 2 ½ teaspoons baking powder.
- Gradually add the dry ingredients to the wet mixture, alternating with 1 cup milk. Mix until smooth.
- Choose Your Pans:
- Use 3 round cake pans (6-inch or 8-inch) for uniform layers. For the dome shape, use an oven-safe bowl or a special doll cake mold.
- Bake the Cakes:
- Preheat the oven to 350°F (175°C). Grease and flour the pans.
- Divide the batter evenly and bake for 25–35 minutes, or until a toothpick inserted into the center comes out clean.
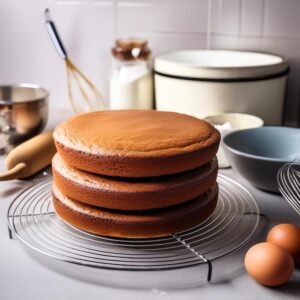
- Cool the cakes completely before assembling.
2 – Prepare the Doll and Trim the Cakes
- Wrap the Doll:
- Remove the lower body of the Barbie doll or wrap the legs securely in plastic wrap for hygiene.
- Trim the Cakes:
- Use a serrated knife to level the tops of each cake layer for even stacking.
- For a dome shape, trim the top layer slightly to create a smooth transition to the gown.
3 – Assemble the Cake
- Stack the Layers:
- Place the first layer on a cake board or plate. Spread a thin layer of buttercream frosting on top.
- Add the second layer and repeat with frosting. Place the dome-shaped layer on top.
- Insert the Doll:
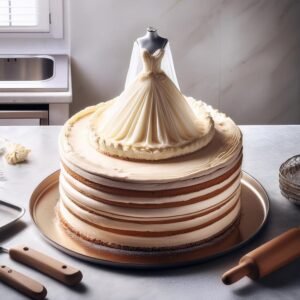
- Carefully insert the wrapped Barbie doll into the center of the stacked layers. The cake should surround the doll’s legs like a ball gown.
- Carve the Shape:
- Use a serrated knife to gently carve the cake layers into a smooth gown shape, blending the dome layer into the base layers.
4 – Frost the Cake
- Crumb Coat:
- Apply a thin layer of buttercream frosting to the entire cake to seal in crumbs. Chill in the refrigerator for 20–30 minutes.
- Final Frosting Layer:
- Use colored buttercream to match your theme. Apply a smooth layer over the entire gown.
5 – Decorate the Barbie Cake
- Piping Details:
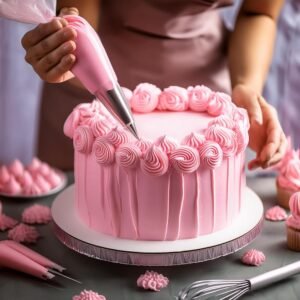
- Use a piping bag with a decorative tip to create ruffles, rosettes, or lace details on the gown.
- Fondant Finish (Optional):
- Roll out fondant and drape it over the cake for a smooth, polished look. Trim the edges and add accents like bows or ribbons.
- Add Final Touches:
- Decorate with edible glitter, pearls, or sprinkles for a glamorous effect. Place accessories like a tiara or wand on the doll if desired.
6 – Serve the Barbie Cake
- Chill Before Serving:
- Chill the cake in the refrigerator for about an hour to set the frosting and decorations.
- Slice Carefully:
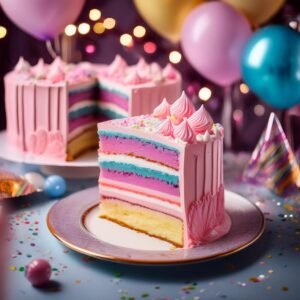
- Use a sharp knife to cut slices from the base, keeping the gown shape intact as you serve.
Tips for Designing the Perfect Barbie Cake
Creating a Barbie cake is an art, and these expert tips will help ensure your cake is both visually stunning and delicious:
Choose the Right Doll
- Pick the Theme:
- Choose a Barbie doll that matches the occasion, such as a princess, ballerina, or fairy.
- You can also customize the doll by selecting one with removable accessories like crowns or jewelry.
- Prep the Doll Properly:
- Wrap the doll’s lower body tightly with plastic wrap to keep it clean and food-safe. If the doll is too tall, consider trimming the legs or using a smaller doll.
Achieve the Perfect Cake Shape
- Use a Dome Mold:
- For a flawless gown shape, use an oven-safe dome mold for the top layer. This ensures a smooth transition from the top to the base.
- Carve with Care:
- Use a serrated knife to trim the cake layers gradually, blending the edges for a seamless gown look. Go slow to avoid cutting too much at once.
Master Frosting Techniques
- Start with a Crumb Coat:
- Apply a thin crumb coat to seal the cake and create a smooth base for the final frosting layer. Chill the cake for 20–30 minutes before adding the next layer.
- Use Gel Food Coloring:
- For vibrant colors, mix gel food coloring into the frosting. It’s more concentrated than liquid coloring, so a little goes a long way.
- Piping Details:
- Use decorative piping tips to create elegant patterns like ruffles, rosettes, or lace. Practice on parchment paper before piping directly onto the cake.
Incorporate Fondant for Elegance
- Smooth Finish:
- Roll out fondant into a thin, even sheet and gently drape it over the cake for a polished look. Smooth it with fondant paddles or your hands.
- Add Fondant Accents:
- Use cookie cutters or fondant molds to create details like flowers, bows, or ribbons.
Play with Colors and Textures
- Theme Colors:
- Coordinate the gown’s colors with the party theme. Popular options include pink, purple, pastel shades, or metallic accents.
- Textures and Effects:
- Use edible glitter or pearl dust for sparkle. Add texture with piped designs, sprinkles, or candy decorations.
Add Accessories for Extra Flair
- Edible Accessories:
- Decorate the gown with edible pearls, sugar flowers, or tiny candy embellishments for a regal touch.
- Doll Styling:
- Style Barbie’s hair with tiny braids or add a crown, tiara, or wand to complete the look.
Keep the Cake Stable
- Support the Layers:
- If the cake is tall, use dowels to stabilize the layers and prevent them from collapsing.
- Secure the Doll:
- Ensure the doll is firmly inserted into the cake to avoid shifting during decoration or slicing.
FAQs :
How Much Do You Charge for a Barbie Cake?
The price for a Barbie cake depends on several factors, including size, complexity, and decorations. Here’s a breakdown:
Homemade: If making it yourself, the cost typically ranges between $20–$50 for ingredients and decorations, depending on the materials used.
Bakery-Made: Professional bakeries usually charge between $50–$150 or more, based on the design and level of detail. Customized cakes with fondant decorations, intricate piping, or unique themes may cost more.
Factors Affecting Cost: Size of the cake (servings needed)
Customizations like fondant, edible decorations, or advanced designs
Can You Use a Bundt Pan for a Barbie Cake?
Yes, a bundt pan works well for making a Barbie cake:
Why It’s Effective: The hole in the center of the bundt pan accommodates the doll’s legs, making it an excellent alternative to a traditional doll cake mold.
How to Use It: Bake the cake in the bundt pan and ensure it cools completely before inserting the doll.
If the bundt pan isn’t tall enough, stack it with additional layers of cake for the desired height.
Tip: Trim the bundt cake to create a smooth dome shape if needed.
How Long to Bake a Cake in a Pyrex Bowl?
Baking a cake in a Pyrex bowl is a great option for creating the dome-shaped top of a Barbie cake.
Temperature and Time: Preheat the oven to 325°F (160°C) to ensure even baking.
Bake for 45–60 minutes, depending on the bowl’s size and the thickness of the batter.
Check for Doneness: Insert a toothpick or skewer into the center of the cake. If it comes out clean, the cake is done.
Tips for Success: Grease the Pyrex bowl thoroughly and dust with flour to prevent sticking.
Allow the cake to cool completely in the bowl before removing it to avoid breaking.
How to Make a Barbie Cake Without a Pan?
You don’t need a special pan to make a Barbie cake. Here’s how to do it with common kitchen tools:
Use Round Cake Pans: Bake 3–4 layers of cake in standard round pans (6-inch or 8-inch) and stack them to create the height for the gown.
Create the Dome Shape: Use a Pyrex bowl or carve the top layer into a dome shape with a serrated knife.
Assemble the Cake: Insert the wrapped Barbie doll into the center and carve the layers gently to resemble a gown.
Decorate: Frost and decorate as you would with a traditional Barbie cake.
Pro Tip: If stacking layers without a dome, use dowels to stabilize the cake.
Suggested Internal Links :
- How Long to Bake a Cake in a Pyrex Bowl?
Learn the specifics of baking a dome-shaped cake for your Barbie cake using a Pyrex bowl. - Taco Lasagna Recipe: A Delicious Fusion of Flavors
Pair your impressive Barbie cake with a bold main dish for a complete party menu. - Crab Brûlée Recipe: A Luxurious Savory Delight
Complement your Barbie cake with an elegant appetizer to impress your guests. - How to Make a Unicorn Cake?
Explore another whimsical dessert idea to create magical memories at celebrations. - What’s the Best Way to Store Cookies?
Learn effective storage techniques for leftover decorations or accompanying desserts.
Conclusion
A Barbie cake is more than just a dessert; it’s a show-stopping centerpiece that brings joy and wonder to any celebration. Whether for a child’s birthday, a themed party, or any special occasion, this cake offers endless opportunities for creativity. From customizing the design with vibrant colors and edible decorations to experimenting with different frosting techniques, the possibilities are truly limitless.By following this guide, you can create a stunning Barbie cake that not only looks impressive but also tastes delicious. Remember, even without specialized pans, you can craft this beautiful cake with simple tools and some creativity. So, gather your ingredients, prep your tools, and get ready to bake a masterpiece that will leave everyone in awe. Happy baking!
Craving more tasty recipes? Make sure to follow us on Facebook , Instagram, Pinterest, and Twitter for daily updates and kitchen inspiration!


