Introduction
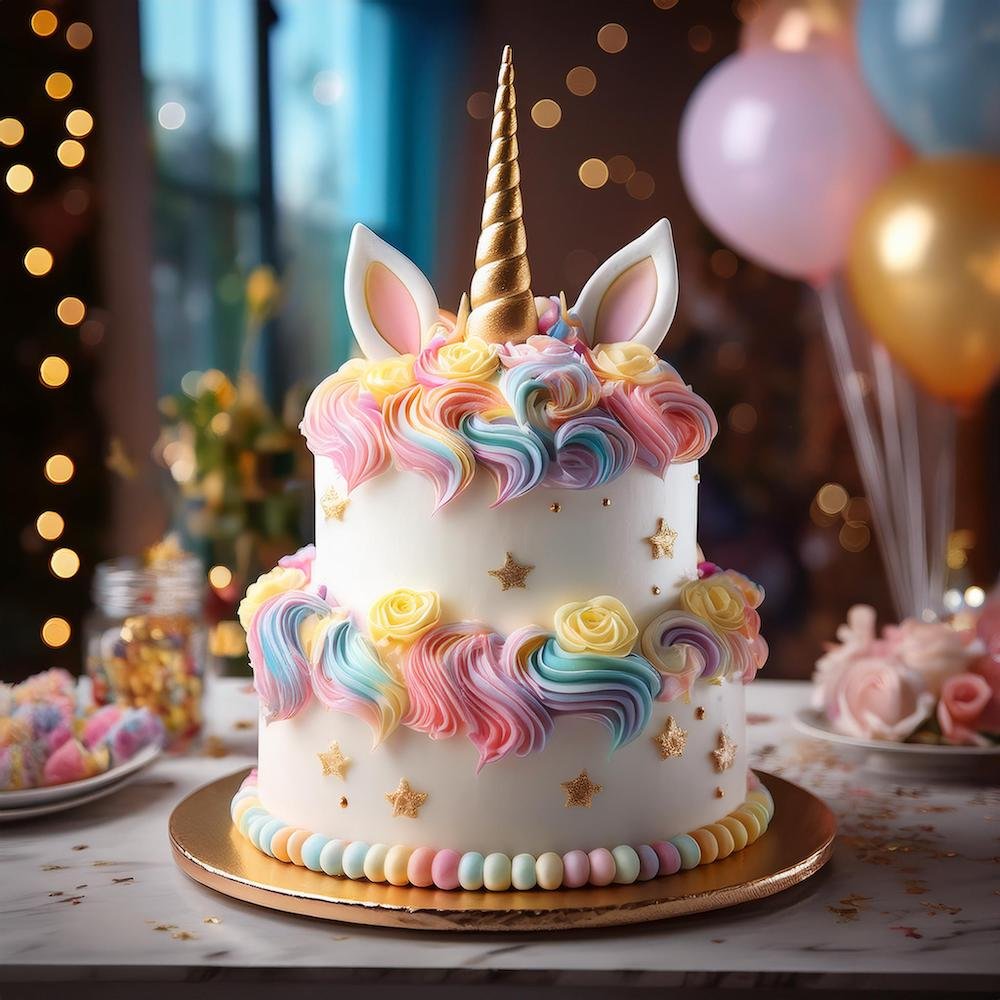
How to Make a Unicorn Cake? A unicorn cake is a magical and colorful dessert that has become a favorite at birthdays, baby showers, and festive celebrations. With its charming golden horn, pastel buttercream mane, and adorable details, it’s the perfect showstopper for any occasion.
While the unicorn cake looks impressive, it’s surprisingly easy to make with the right tools and step-by-step instructions. Whether you’re an experienced baker or trying your hand at cake decorating for the first time, this guide will walk you through the entire process of creating a whimsical unicorn cake at home.
From baking soft, fluffy cake layers to piping a vibrant mane and crafting a shimmering fondant horn, you’ll learn everything you need to know to bring this magical dessert to life. Let’s dive into the ingredients, tools, and step-by-step directions so you can make your very own unicorn cake!
Ingredients and Tools You’ll Need
Before you start creating your unicorn cake, gather all the necessary ingredients and tools. Preparation is key to making the process smooth and enjoyable.
Ingredients
For the Cake Layers:
- All-Purpose Flour: 3 cups
- Baking Powder: 2 ½ teaspoons
- Salt: 1 teaspoon
- Unsalted Butter: 1 cup (softened)
- Granulated Sugar: 2 cups
- Eggs: 4 large eggs (room temperature)
- Whole Milk: 1 cup
- Vanilla Extract: 2 teaspoons
- Gel Food Coloring: Pink, blue, purple, and yellow for colorful layers (optional)
the Buttercream Frosting:
- Unsalted Butter: 1 ½ cups (softened)
- Powdered Sugar: 4–5 cups (sifted)
- Vanilla Extract: 2 teaspoons
- Heavy Cream or Milk: 4–6 tablespoons (adjust for consistency)
- Gel Food Coloring: Pastel shades (pink, purple, blue, and yellow)
the Decorations:
- Fondant: White fondant for the horn and ears
- Edible Gold Dust or Spray: For painting the horn and adding shimmer
- Black Food Coloring: For creating the unicorn’s eyes
- Sprinkles and Glitter: Optional for added magic
Tools You’ll Need
- Cake Pans: Three 8-inch round pans for even baking.
- Electric Mixer: To make the batter and buttercream frosting.
- Offset Spatula: For spreading the frosting smoothly.
- Bench Scraper: To achieve clean, smooth sides.
- Piping Bags and Star Tips: For creating the unicorn’s buttercream mane (Wilton 1M or similar).
- Fondant Tools: For shaping the horn and ears.
- Turntable: To make frosting and decorating easier.
- Toothpicks or Skewers: To secure the horn and ears in place.
Step-by-Step Instructions on How to Make a Unicorn Cake
Creating a unicorn cake may seem complex, but by following these clear and simple steps, you’ll bring your magical creation to life. Let’s break it down into manageable stages—baking, frosting, assembling, and decorating!
1 – Bake the Cake Layers
- Preheat the Oven:
- Preheat your oven to 350°F (175°C). Grease and line three 8-inch round cake pans with parchment paper for easy release.
- Prepare the Cake Batter:
- In a medium bowl, whisk together 3 cups flour, 2 ½ teaspoons baking powder, and 1 teaspoon salt.
- In a large bowl, use an electric mixer to cream 1 cup softened butter and 2 cups granulated sugar until light and fluffy (about 3–4 minutes).
- Add 4 eggs, one at a time, mixing well after each addition. Stir in 2 teaspoons vanilla extract.
- Combine Wet and Dry Ingredients:
- Gradually add the dry flour mixture to the butter mixture, alternating with 1 cup milk, beginning and ending with the dry ingredients. Mix until smooth, but don’t overmix.
- Color the Batter (Optional):
- Divide the batter evenly into 4 bowls. Use gel food coloring to tint each portion a pastel color—pink, blue, purple, and yellow. Stir gently to avoid deflating the batter.
- Bake the Cakes:
- Pour each colored batter into the prepared pans. Bake for 25–30 minutes, or until a toothpick inserted into the center comes out clean.
- Let the cakes cool in their pans for 10 minutes, then transfer to wire racks to cool completely.
2 – Make the Buttercream Frosting
- Cream the Butter:
- In a large bowl, beat 1 ½ cups softened unsalted butter on medium-high speed until smooth and creamy.
- Add Powdered Sugar:
- Gradually add 4–5 cups powdered sugar, one cup at a time, mixing well after each addition.
- Flavor and Adjust Consistency:
- Stir in 2 teaspoons vanilla extract and add 4–6 tablespoons heavy cream or milk to adjust the frosting to a spreadable consistency.
- Color the Frosting:
- Divide the frosting into separate bowls and tint each with pastel gel food colors (pink, purple, blue, and yellow) for the unicorn mane. Leave some white frosting for the cake’s base.
3 – Assemble the Cake
- Level the Cakes:
- Trim the tops of each cake layer with a serrated knife to make them flat and even.
- Stack the Layers:
- Place the first cake layer on a cake turntable or stand. Spread a thin layer of white buttercream frosting on top. Repeat with the second and third layers.
- Crumb Coat the Cake:
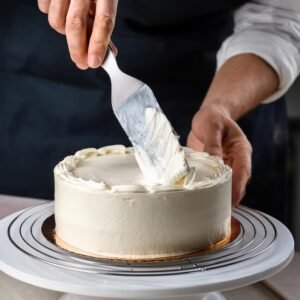
- Apply a thin layer of white buttercream frosting over the entire cake to trap crumbs. Use an offset spatula to smooth it out. Chill the cake for 20–30 minutes to set the crumb coat.
- Final Frosting:
- Once chilled, apply a smooth, final layer of white buttercream frosting over the entire cake. Use a bench scraper and offset spatula for a clean finish.
4 – Decorate the Unicorn Cake
- Make the Unicorn Horn and Ears:
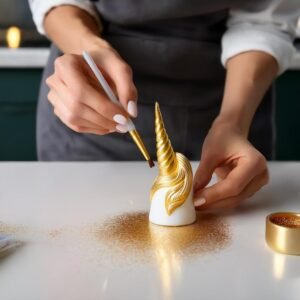
- Roll white fondant into a long cone shape to create the horn. Twist it gently to mimic a spiral, then brush it with edible gold dust or spray for a shimmering effect.
- For the ears, shape two fondant triangles, flatten slightly, and add a smaller pink triangle inside for detail.
- Attach the Horn and Ears:
- Insert a toothpick or skewer into the horn and position it in the center of the cake. Place the ears on either side of the horn, securing them with toothpicks.
- Pipe the Unicorn Mane:
- Fill piping bags with pastel-colored frosting (using star tips like Wilton 1M). Pipe swirls, rosettes, and stars across the top of the cake and down one side to create the unicorn’s mane.
- Draw the Eyes:
- Use black buttercream, melted chocolate, or an edible pen to draw the unicorn’s closed eyes with long lashes on the front of the cake.
- Add Final Touches:
- Sprinkle edible glitter, pearls, or pastel sprinkles over the mane for a magical finish.
5 – Serve and Enjoy
- Chill the Cake:
- Chill the unicorn cake for at least 20 minutes to set the decorations. Let it sit at room temperature for 30 minutes before serving for the best texture.
- Slice and Share:
- Use a sharp knife to cut clean slices, revealing the colorful layers inside. Serve and watch the smiles light up around the table!
How to Make Unicorn Horn, Ears, and Eyes
The decorations are what bring your unicorn cake to life! The golden horn, delicate ears, and charming eyes are the details that transform a simple cake into a magical masterpiece. Here’s a step-by-step guide to making each element.
Unicorn Horn
The horn is the centerpiece of your unicorn cake and should stand tall and shimmer with magic.
Materials Needed:
- White Fondant or Modeling Chocolate: For shaping the horn.
- Edible Gold Dust or Gold Luster Spray: For the shimmer effect.
- Toothpick, Skewer, or Dowel: To secure the horn in place.
- Brush: For applying gold dust.
Steps to Make the Unicorn Horn:
- Shape the Horn:
- Roll a ball of white fondant into a long cone shape, tapering one end to form a point.
- Twist the fondant gently into a spiral shape to mimic the look of a unicorn horn.
- Add a Skewer for Stability:
- Insert a skewer or toothpick into the base of the horn to hold its shape and make it easy to attach to the cake.
- Paint It Gold:
- Brush the horn with edible gold dust mixed with a tiny bit of water, or use edible gold luster spray to add a shimmering finish. Let it dry completely.
- Secure on the Cake:
- Push the skewer firmly into the center of the cake, ensuring the horn stands upright.
Pro Tip: Make the horn a day ahead so it can harden before placing it on the cake.
Unicorn Ears
The ears are the perfect complement to the horn and help create the adorable unicorn look.
Materials Needed:
- White Fondant: For the base of the ears.
- Pink Fondant or Edible Paint: For the inner ear detail.
- Toothpicks or Skewers: To secure the ears onto the cake.
Steps to Make the Unicorn Ears:
- Shape the Ears:
- Roll out white fondant and cut out two triangles for the ears. Flatten the base slightly so they sit well on the cake.
- Shape the triangles by curving the edges slightly to make them look natural.
- Add Pink Details:
- Roll out a smaller amount of pink fondant and cut two smaller triangles. Place them in the center of the white fondant ears to mimic the inner ear. Alternatively, paint the inner part with edible pink food coloring.
- Secure with Toothpicks:
- Insert toothpicks or small dowels into the base of each ear so they can stand upright on the cake.
- Attach the Ears:
- Position the ears on either side of the horn, securing them firmly into the cake.
Pro Tip: Let the ears set for at least 1–2 hours before placing them on the cake to prevent them from drooping.
Unicorn Eyes
The unicorn’s eyes give the cake its cute, whimsical personality. They’re typically drawn as closed eyes with long lashes for a dreamy look.
Materials Needed:
- Black Buttercream: For piping the eyes.
- Piping Bag with a Small Round Tip: For precision.
- Edible Pen or Melted Chocolate: As an alternative to buttercream.
Steps to Make the Unicorn Eyes:
- Plan the Placement:
- Use a toothpick to lightly mark where you want the eyes to go on the cake, ensuring they are symmetrical.
- Pipe the Eyes:
- Fill a piping bag with black buttercream fitted with a small round tip. Pipe two curved lines to resemble closed eyes.
- Add 2–3 small, curved lashes extending from each eye for a delicate and cute look.
- Alternative Option:
- If you prefer not to use buttercream, you can draw the eyes using an edible black pen or pipe melted chocolate instead.
Pro Tip: Practice piping the eyes on parchment paper first to ensure smooth, clean lines before decorating the cake.
Final Decorative Touches
To make your unicorn cake even more magical, consider these finishing touches:
- Buttercream Mane:
- Use pastel-colored frosting to pipe swirls, stars, and rosettes flowing down from the top of the cake to one side.
- Edible Glitter and Pearls:
- Sprinkle edible glitter or place edible pearls along the mane and around the cake’s base for extra sparkle.
- Sprinkles and Confetti:
- Add colorful sprinkles or edible confetti to the buttercream mane for a playful look.
- Fresh Flowers:
- If you prefer, add food-safe fresh flowers like roses or daisies for a whimsical, elegant touch.
By following these steps, you can easily craft the unicorn horn, ears, and eyes that bring your cake to life. Combined with a vibrant buttercream mane and magical finishing touches, your unicorn cake will be a stunning centerpiece for any celebration.
Pro Tips for a Perfect Unicorn Cake
Creating a unicorn cake that looks professional and magical requires some key tricks and techniques. These pro tips will help you achieve a flawless cake with smooth frosting, stable decorations, and vibrant colors—perfect for impressing your guests!
1. Prepare Your Cake Layers Properly
- Level Your Cakes: Use a serrated knife or cake leveler to trim the tops of each cake layer. Even, flat layers will help the cake stack neatly and prevent tilting.
- Chill the Cake Layers: After baking and cooling, chill your cake layers in the refrigerator for 20–30 minutes. Cold cake layers are easier to frost and assemble.
Pro Tip: Brush the cake layers with a simple syrup (equal parts sugar and water boiled together) to keep them moist and flavorful.
2. Achieve a Smooth Buttercream Finish
- Crumb Coat First: Apply a thin layer of frosting (called a crumb coat) to trap crumbs and create a clean base. Chill the cake for 20–30 minutes to set the crumb coat.
- Use a Turntable: A cake turntable makes it easy to apply and smooth the frosting evenly.
- Bench Scraper for Perfection: Hold a bench scraper flat against the sides of the cake while spinning it on the turntable. This will create clean, smooth edges.
Pro Tip: Dip the offset spatula or bench scraper in warm water, dry it, and run it over the frosting for an extra-smooth finish.
3. Get Vibrant Buttercream Colors
- Use Gel Food Coloring: Gel-based food coloring gives vibrant, rich colors without altering the texture of the buttercream. Avoid liquid food coloring, which can thin the frosting.
- Mix Gradually: Add a little coloring at a time using a toothpick. It’s easier to build up color than to correct overly bright frosting.
- Blend Colors for Depth: Mix two shades of the same color (e.g., light pink and deep pink) in the same piping bag for a beautiful ombré effect.
Pro Tip: For a pastel look, start with a very small amount of gel food coloring—you can always add more.
4. Create a Stable Unicorn Horn and Ears
- Let Decorations Dry: Make the horn and ears 1–2 days ahead using fondant or modeling chocolate. This gives them time to harden and stand upright on the cake.
- Use Skewers or Toothpicks: Insert toothpicks or skewers into the base of the horn and ears to secure them firmly onto the cake.
- Paint Carefully: Use a clean food-safe brush to apply edible gold luster dust or spray onto the horn and ears for a shimmering finish.
Pro Tip: If you don’t have fondant, use a sugar cone for the horn—paint it with edible gold spray for a quick and easy alternative.
5. Master the Buttercream Mane
- Use Star Tips: Use piping tips like Wilton 1M or 2D to pipe swirls, rosettes, and stars for the unicorn’s mane. Combine pastel colors (pink, blue, purple, yellow) for a rainbow effect.
- Layer for Texture: Start with larger swirls and rosettes, then fill in gaps with smaller stars and dots for dimension and fullness.
- Keep Frosting Cool: If your buttercream becomes too soft, refrigerate it for 5–10 minutes to firm it up before piping.
Pro Tip: Practice piping on parchment paper first to get comfortable with your technique before decorating the cake.
6. Draw Symmetrical Unicorn Eyes
- Plan the Placement: Lightly mark the eye placement on the cake with a toothpick for symmetry.
- Use a Small Tip: Use a small round piping tip or edible black food pen to create smooth, curved eyes and delicate lashes.
- Work Slowly: Pipe or draw the eyes slowly in one fluid motion to avoid wobbly lines.
Pro Tip: If you make a mistake, gently scrape off the frosting with a clean spatula and redo the eye.
7. Keep the Cake Stable and Fresh
- Chill Between Steps: Refrigerate the cake after crumb coating, frosting, and decorating to maintain its structure.
- Transport Carefully: If moving the cake, place it on a sturdy cake board and keep it level during transportation.
- Store Properly: Store the finished unicorn cake in the refrigerator. Allow it to come to room temperature for 30 minutes before serving.
Pro Tip: Add decorations like sprinkles or glitter just before serving to keep them looking fresh and vibrant.
8. Time-Saving Tips for Beginners
- Use a Box Cake Mix: If you’re short on time, a boxed cake mix works just as well as homemade layers.
- Buy Ready-Made Fondant: Pre-colored fondant is a time-saver for the horn and ears.
- Simplify the Mane: Instead of piping intricate swirls, use fewer colors and larger rosettes for an easier design.
Unicorn Cake Variations
Unicorn cakes are as customizable as they are magical. Whether you’re looking for different flavors, creative designs, or dietary alternatives, these variations allow you to add your personal touch to the classic unicorn cake.
Rainbow Unicorn Cake
Why It’s Fun: A rainbow unicorn cake features colorful layers inside, creating a delightful surprise when the cake is sliced.
How to Make It:
- Divide the cake batter evenly into six bowls.
- Use gel food coloring to tint each portion a rainbow shade: red, orange, yellow, green, blue, and purple.
- Bake each color in separate 8-inch cake pans.
- Stack the rainbow layers with white buttercream frosting in between. Decorate with the unicorn horn, ears, and a vibrant buttercream mane.
Pro Tip: Pair this design with a colorful buttercream mane for a stunning rainbow effect inside and out.
2. Chocolate Unicorn Cake
Why It’s Delicious: For chocolate lovers, a rich chocolate cake base provides a decadent twist on the classic unicorn cake.
How to Make It:
- Replace ½ cup of all-purpose flour with cocoa powder in your cake batter to create a rich chocolate flavor.
- Use chocolate buttercream as the filling between layers.
- Frost the exterior with white buttercream to maintain the unicorn’s iconic look.
- Decorate with a pastel-colored buttercream mane and add chocolate sprinkles for a magical touch.
Pro Tip: Drizzle chocolate ganache over the cake’s edges for a luxurious finishing touch.
3. Unicorn Cupcakes
Why It’s Perfect: Unicorn cupcakes are ideal for individual servings at parties, birthdays, or events. They’re easy to make and just as enchanting as a full cake.
How to Make It:
- Bake vanilla or chocolate cupcakes and let them cool completely.
- Use piping bags with star tips to pipe colorful swirls of buttercream frosting on top.
- Add mini fondant horns and ears (made using the same method as the full cake).
- Draw tiny unicorn eyes with black edible pen or melted chocolate.
Pro Tip: Sprinkle edible glitter or pastel sprinkles over the cupcakes for a magical finish.
4. Vegan Unicorn Cake
Why It’s Great: A vegan unicorn cake is perfect for guests with dietary restrictions, without sacrificing taste or style.
How to Make It:
- Use a vegan cake recipe that substitutes eggs with flax eggs (1 tablespoon flaxseed + 3 tablespoons water) and dairy milk with almond, oat, or soy milk.
- For frosting, use vegan butter, powdered sugar, and a splash of non-dairy milk for a smooth buttercream.
- Decorate with vegan-friendly fondant, edible gold paint, and plant-based food coloring.
Pro Tip: Double-check that all decorations, such as sprinkles, are vegan-friendly.
5. Gluten-Free Unicorn Cake
Why It’s Ideal: Perfect for those with gluten sensitivities, this version ensures everyone can enjoy the unicorn magic.
How to Make It:
- Replace the all-purpose flour in your recipe with a gluten-free flour blend. Add ½ teaspoon xanthan gum if the flour blend doesn’t already include it.
- Use gluten-free baking powder and other certified gluten-free ingredients.
- Follow the same baking, frosting, and decorating steps as the traditional unicorn cake.
Pro Tip: Add fresh fruit like strawberries or blueberries between the layers for a delicious gluten-free twist.
6. Drip Unicorn Cake
Why It’s Trendy: Adding a colorful drip takes your unicorn cake to the next level, making it look both fun and artistic.
How to Make It:
- Prepare a white or pastel unicorn cake with a smooth buttercream base.
- Make a ganache using white chocolate and heavy cream, then tint it with your choice of gel food coloring.
- Use a spoon or squeeze bottle to carefully drip the ganache down the edges of the cake.
- Add the horn, ears, and buttercream mane as usual.
Pro Tip: Use multiple pastel-colored drips for an extra vibrant and playful look.
7. Mini Layered Unicorn Cake
Why It’s Cute: A mini unicorn cake is ideal for small gatherings or as a personal-sized treat.
How to Make It:
- Bake the cake batter in smaller 4-inch or 6-inch cake pans to create mini layers.
- Frost and stack the mini layers as you would with a full-sized cake.
- Decorate with a mini fondant horn, tiny ears, and piped pastel swirls for the mane.
Pro Tip: Serve mini unicorn cakes on individual cake boards for an elegant presentation.
8. Floral Unicorn Cake
Why It’s Elegant: Replace the buttercream mane with edible flowers or piped floral buttercream for a sophisticated and unique twist.
How to Make It:
- Bake and frost a classic unicorn cake with white buttercream.
- Use piping bags with petal tips to create buttercream roses, daisies, and other floral designs.
- Alternatively, add food-safe edible flowers like roses, violets, or daisies for a natural look.
- Complete the cake with a golden horn and fondant ears.
Pro Tip: Use soft pastel colors for the flowers to maintain the magical unicorn theme.
FAQs
How to Decorate a Cake to Look Like a Unicorn?
Smooth Base: Frost the cake with white buttercream.
Horn & Ears: Shape fondant into a spiral horn, paint it gold, and add fondant ears.
Mane: Pipe pastel buttercream swirls with star tips.
Eyes: Use black buttercream or an edible pen for closed, dreamy eyes.
Finishing Touches: Add edible glitter, sprinkles, or pearls for magic.
How to Make a Unicorn Cake for a Birthday?
Bake & Frost: Bake three 8-inch layers, stack with buttercream, and frost with white buttercream.
Decorate Features: Add a fondant horn, ears, and a piped pastel mane.
Final Touches: Draw closed eyes and add sprinkles or glitter for a festive look.
How Do You Make a Unicorn Horn for a Cake?
Materials: Fondant, edible gold dust, skewer.
Steps: Shape fondant into a spiral cone, paint it gold, and secure it to the cake with a skewer.
Pro Tip: Let the horn harden before attaching.
What Piping Tips to Use for a Unicorn Cake?
Wilton 1M & 2D: Create rosettes and swirls.
Wilton 4B & Round Tips: Add stars and details.
Leaf Tip (352): Add leafy accents if desired.
Pro Tip: Use pastel-colored buttercream for a magical effect.
Suggested Internal Links :
- What’s the Difference Between Crème Brûlée and Custard?
Explore the techniques and ingredients that differentiate these creamy desserts. - What Type of Cream is Best for Crème Brûlée?
Learn about creams that can also be used for luxurious cake fillings or frostings. - Unicorn Cake Recipe: A Magical Treat for Celebrations
Get additional inspiration for decorating and presenting a stunning unicorn cake. - Small Batch Chocolate Chip Cookies Recipe
Pair mini treats with your unicorn cake for a delightful dessert table. - Taco Lasagna Recipe: A Delicious Fusion of Flavors
Balance a whimsical dessert with a hearty, savory dish for a complete party menu.
Conclusion
Making a unicorn cake is a fun and magical way to showcase your creativity while creating a stunning dessert for birthdays, celebrations, or any special occasion. By following this guide, you’ve learned how to bake perfect cake layers, craft a shimmering fondant horn, and pipe a colorful buttercream mane that brings your unicorn cake to life.
With the right tools, vibrant colors, and attention to detail, even beginners can create a professional-looking unicorn cake that will delight guests of all ages. Whether you choose to add rainbow layers, chocolate flavors, or fun sprinkles, your unicorn cake is sure to be the star of the dessert table.
Now that you have all the steps, tips, and inspiration you need, it’s time to bring your unicorn cake vision to life. Enjoy the process, have fun with the decorations, and get ready to impress everyone with your magical creation!
Craving more tasty recipes? Make sure to follow us on Facebook , Instagram, Pinterest, and Twitter for daily updates and kitchen inspiration!
